Creating Your First Tournament
Last updated: June 22, 2026
Sign up and create your tournament in about 5 minutes, then follow the in-app Setup Checklist to fill in everything else.
1. Sign Up via the Wizard#
From the home page click Get Started. The /start wizard takes you through three short steps:
- Pick your sport from the gallery (30+ sports supported)
- Tournament basics — name, optional season, website language, timezone
- Create your account — Google one-click or email + password
You land on the dashboard on the Free plan. No payment card needed.
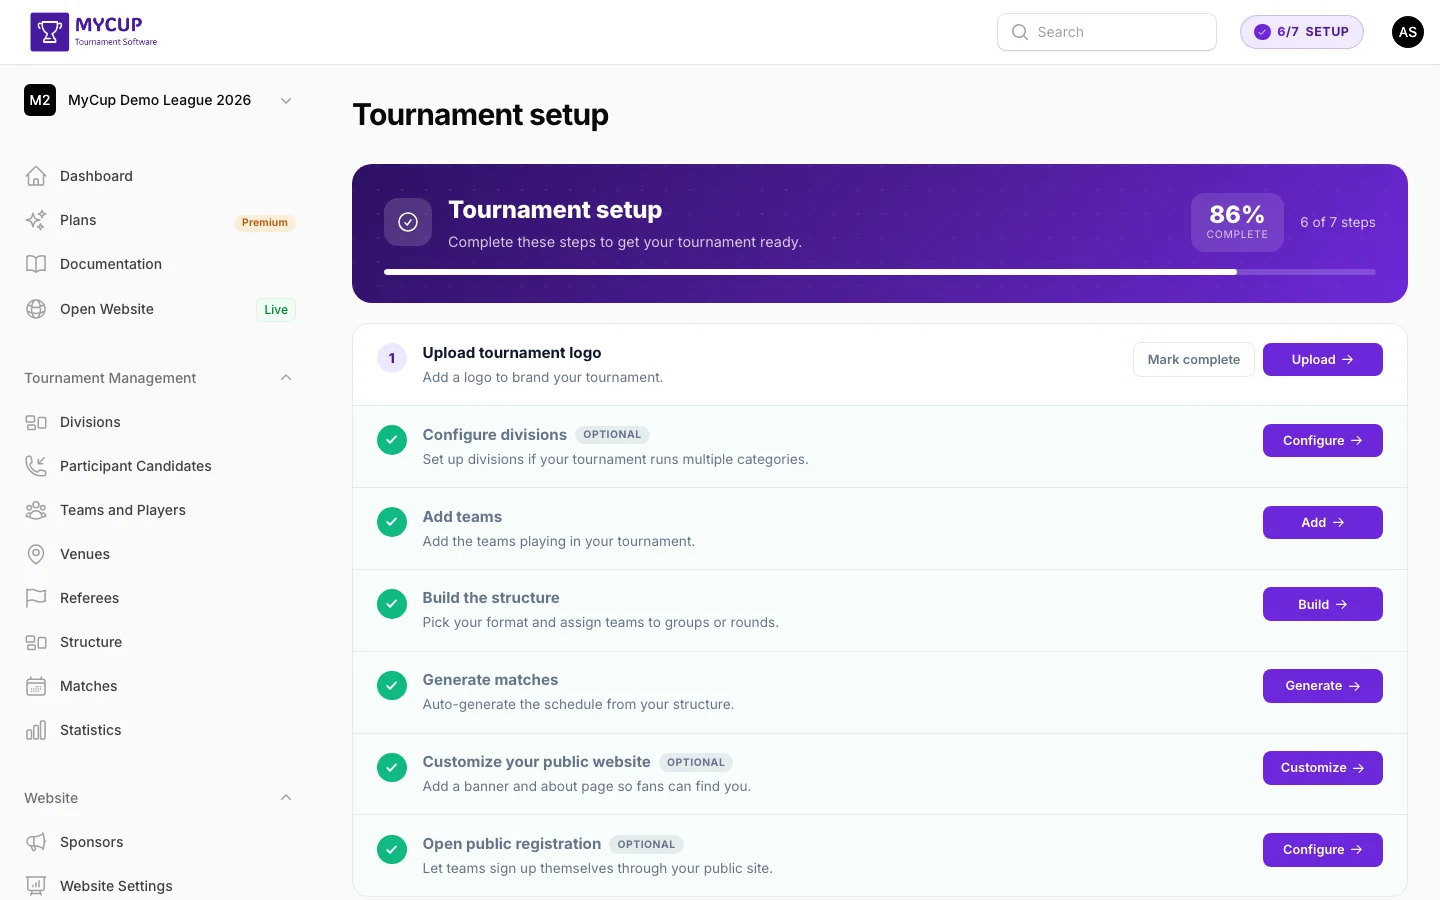
2. Follow the Setup Checklist#
Your dashboard greets you with a Setup progress card. Click View all steps to open the full checklist — that's your primary guide. Each step links to the right page, and ticks automatically as data appears.
For a tour of the dashboard itself, see the Dashboard Overview.
3. The Order That Matters: Teams → Structure → Matches#
The one rule worth remembering:
- Add teams under Tournament Management → Teams and Players (manually, or enable public registration from the Registration tab in the Website Editor)
- Build the structure under Tournament Management → Structure — pick league, knockout, or groups + knockout, then place teams into groups or bracket slots
- Click "Generate matches" at the top of the Structure page — that's the only place matches are produced
If you change the structure later, the same button becomes Regenerate matches with an Outdated badge. A confirmation modal lists any matches with entered scores before replacing them.
See the Tournament Structure guide for advanced formats.
4. Share It#
Once matches exist:
- Open Website from the sidebar to share the public URL with players and fans
- Tournament Users → Admin Users to invite co-admins if someone else is helping run the event
Common Questions#
Can I change the format later? Yes — edit the Structure and click Regenerate matches. Entered scores are listed in a confirmation before being replaced.
Can I add matches manually on the Matches page? No — matches are produced only by generating from the Structure page. The Matches page is for entering and editing results.
How many teams can I add? Free 8, Pro 50, Premium 500. See Plans.
Was this page helpful?
Let us know if you found this documentation helpful or if you have suggestions for improvement.