Team Forms
Last updated: July 22, 2026
Team Forms allow tournament organizers to create custom forms that teams must complete. Use them to collect any information you need from participating teams -- meal planning, accommodation requests, emergency contacts, tournament agreements, and more.
Real-World Example: Managing Meals and Accommodation#
A common use case is collecting meal and accommodation information from teams. Instead of managing this through emails or spreadsheets, you can create dedicated forms that team managers fill out directly in their Team Panel. The responses are collected in a table that you can view and export as CSV.
Here's how to set this up step by step.
For Organizers: Creating Forms#
Step 1: Navigate to Custom Forms#
- Open your tournament's admin panel
- In the sidebar, expand the Team Panel group and click Custom Forms
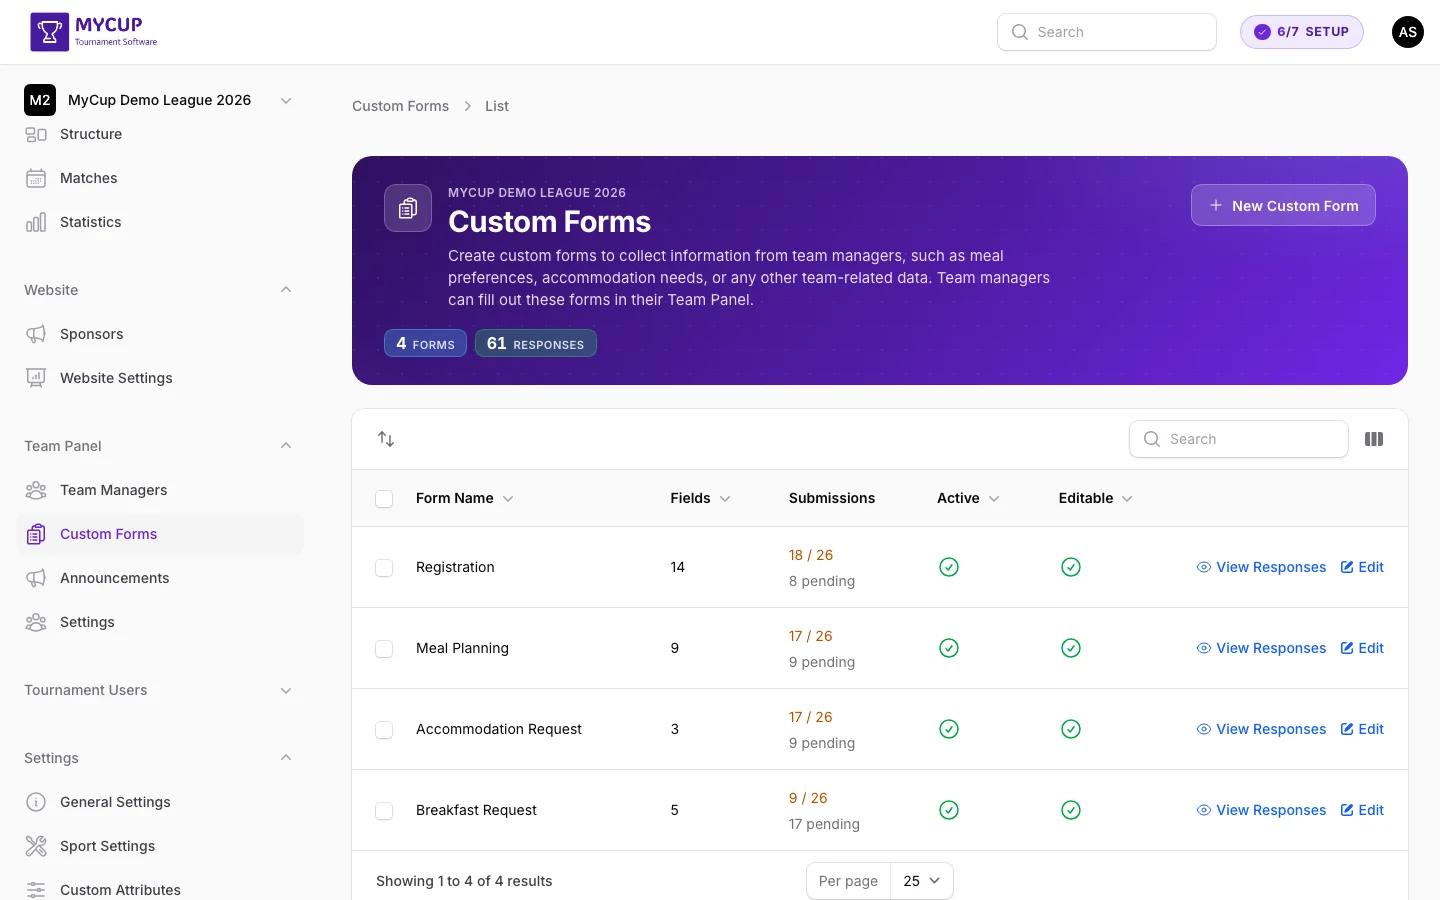
This page shows all your forms with their field count, submission progress, status, and actions.
Step 2: Create a New Form#
Click New Custom Form to open the form builder.
Example: Meal Planning Form#
Here's a practical example -- a form to collect meal counts from each team:
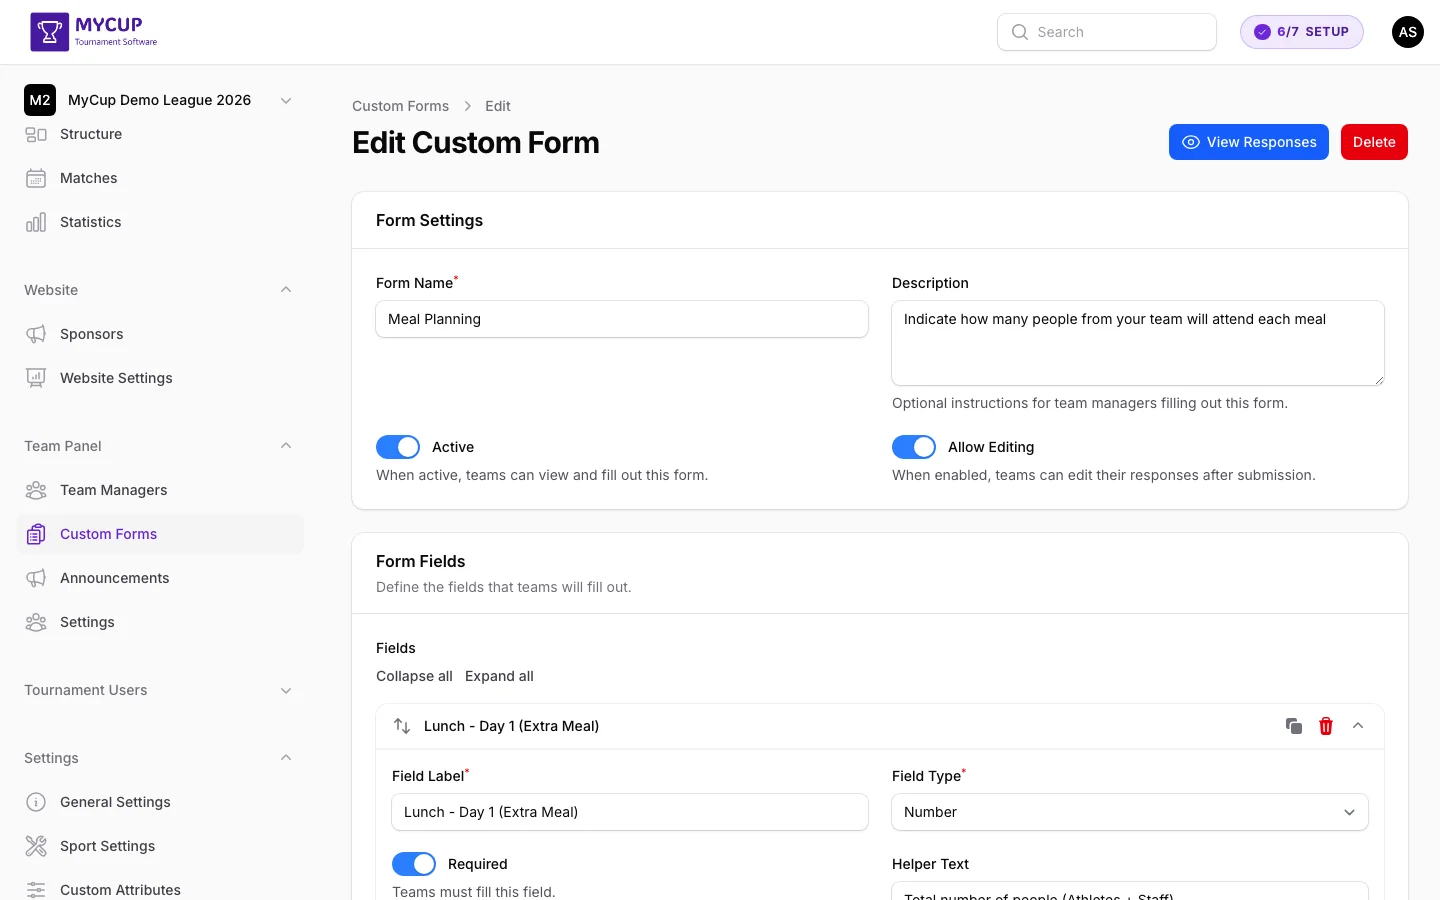
This form uses:
- Number fields for breakfast, lunch, and dinner headcounts (all required)
- Dropdown field for dietary restrictions with predefined options (None, Vegetarian, Vegan, Gluten-Free, Halal)
- A clear description explaining what information is needed and why
- Allow Editing enabled so teams can update their numbers if plans change
Example: Accommodation Request Form#
Another form to collect accommodation needs:
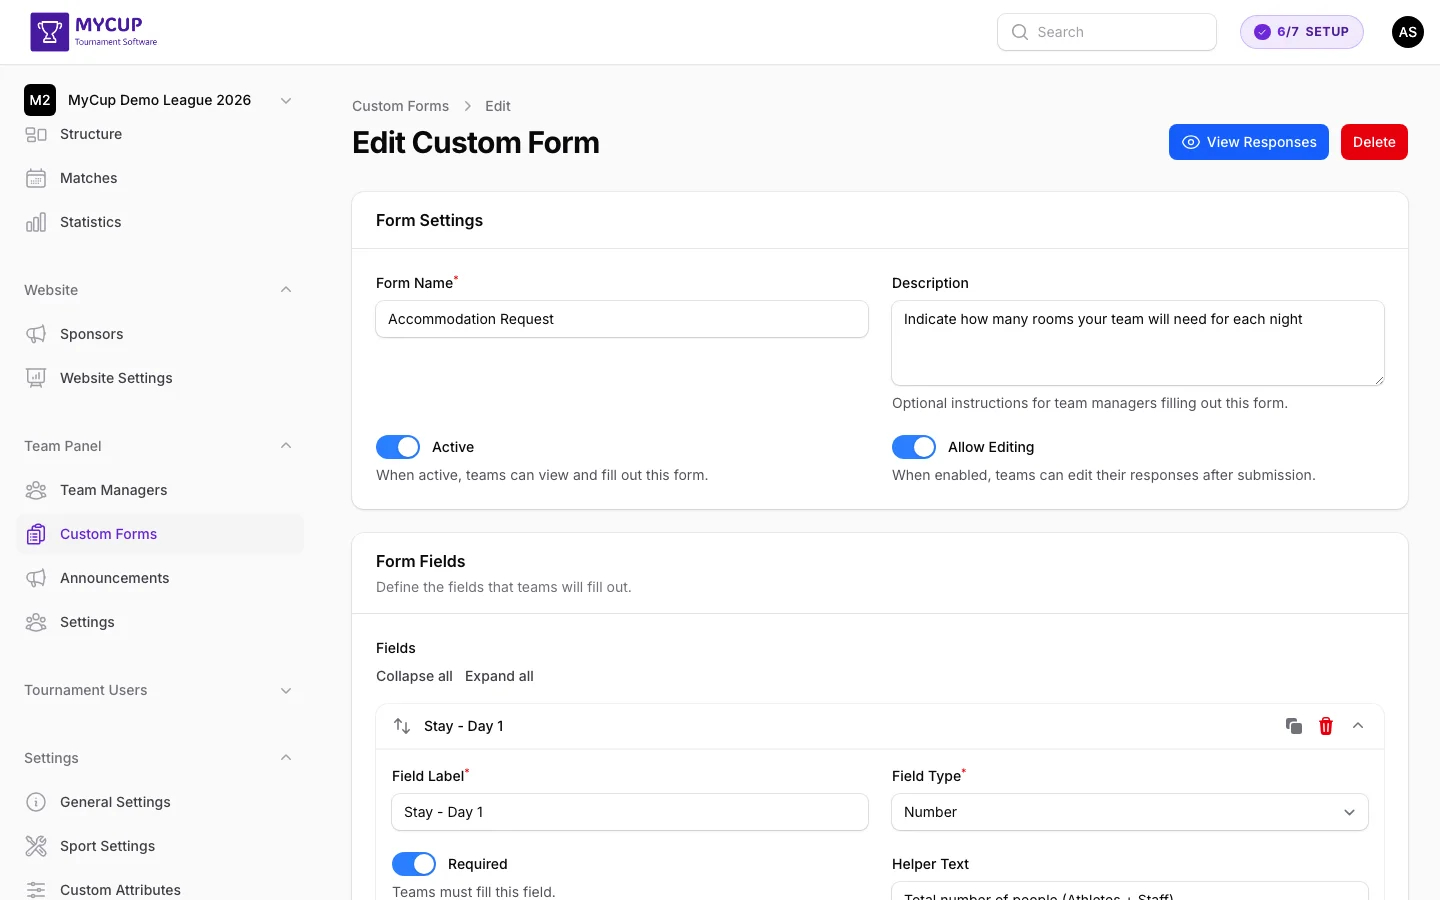
This form demonstrates using multiple field types together:
- Number field for the number of people needing accommodation
- Date fields for check-in and check-out dates
- Dropdown field for room type preference (Single, Double, Triple)
- Text field (optional) for special requests like accessibility needs
Form Settings#
When creating a form, configure these settings:
- Form Name -- The title teams will see (e.g., "Meal Planning", "Accommodation Request")
- Description -- Instructions for team managers. Be specific about what you need and any deadlines
- Active -- When enabled, teams can view and fill out the form
- Allow Editing -- When enabled, teams can modify their responses after submission. Enable this for information that might change (meal counts, accommodation), disable for final agreements
Form Field Types#
| Type | Best For | Example |
|---|---|---|
| Text | Open-ended answers | Special requests, notes |
| Number | Quantities, counts | Number of people for meals |
| Dropdown | Choosing from a set of options | Room type, dietary restrictions |
| Checkbox | Yes/no confirmations | Agreement acceptance |
| Date | Dates | Check-in/check-out dates |
Configuring Each Field#
For every field, you can set:
- Label -- The field name teams will see (e.g., "Number of People for Breakfast")
- Field Type -- Select the appropriate type from the dropdown
- Required -- Toggle on for mandatory fields (marked with * for teams)
- Helper Text -- Additional instructions shown below the field (e.g., "Total number of people who need breakfast, including players and staff")
- Options -- For Dropdown fields only: type each option and press Enter to add it
Step 3: View Responses#
Once teams start submitting responses, you can view all submissions in a table:
- Go to Custom Forms in the sidebar
- Click View Responses next to the form
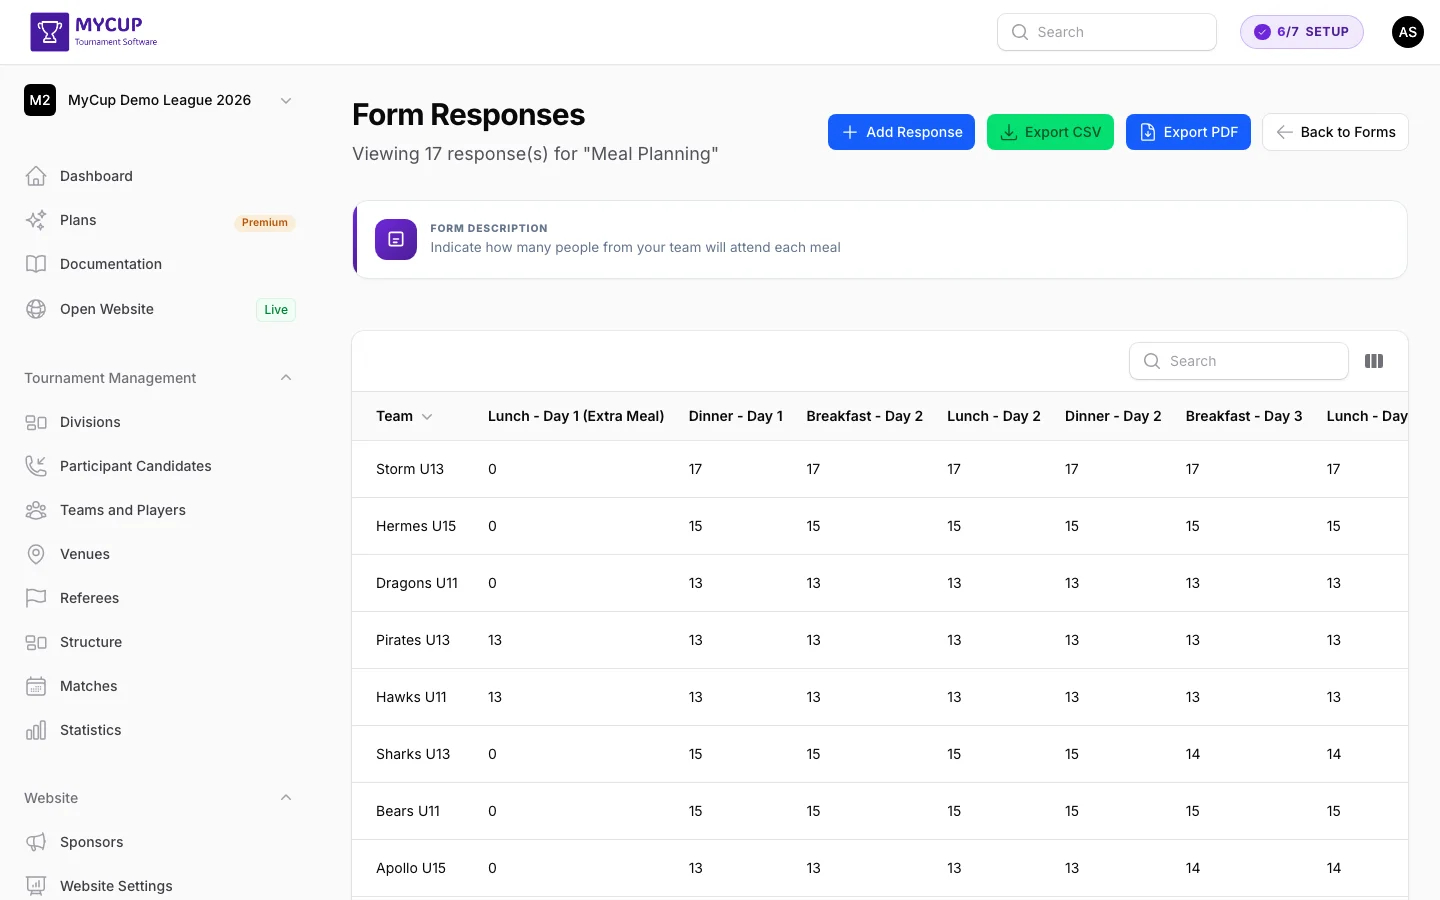
The responses table shows:
- Team name -- Which team submitted
- Field values -- Each form field as a column with the team's answer
- Submitted By -- The team manager who submitted
- Submitted At -- When the response was submitted
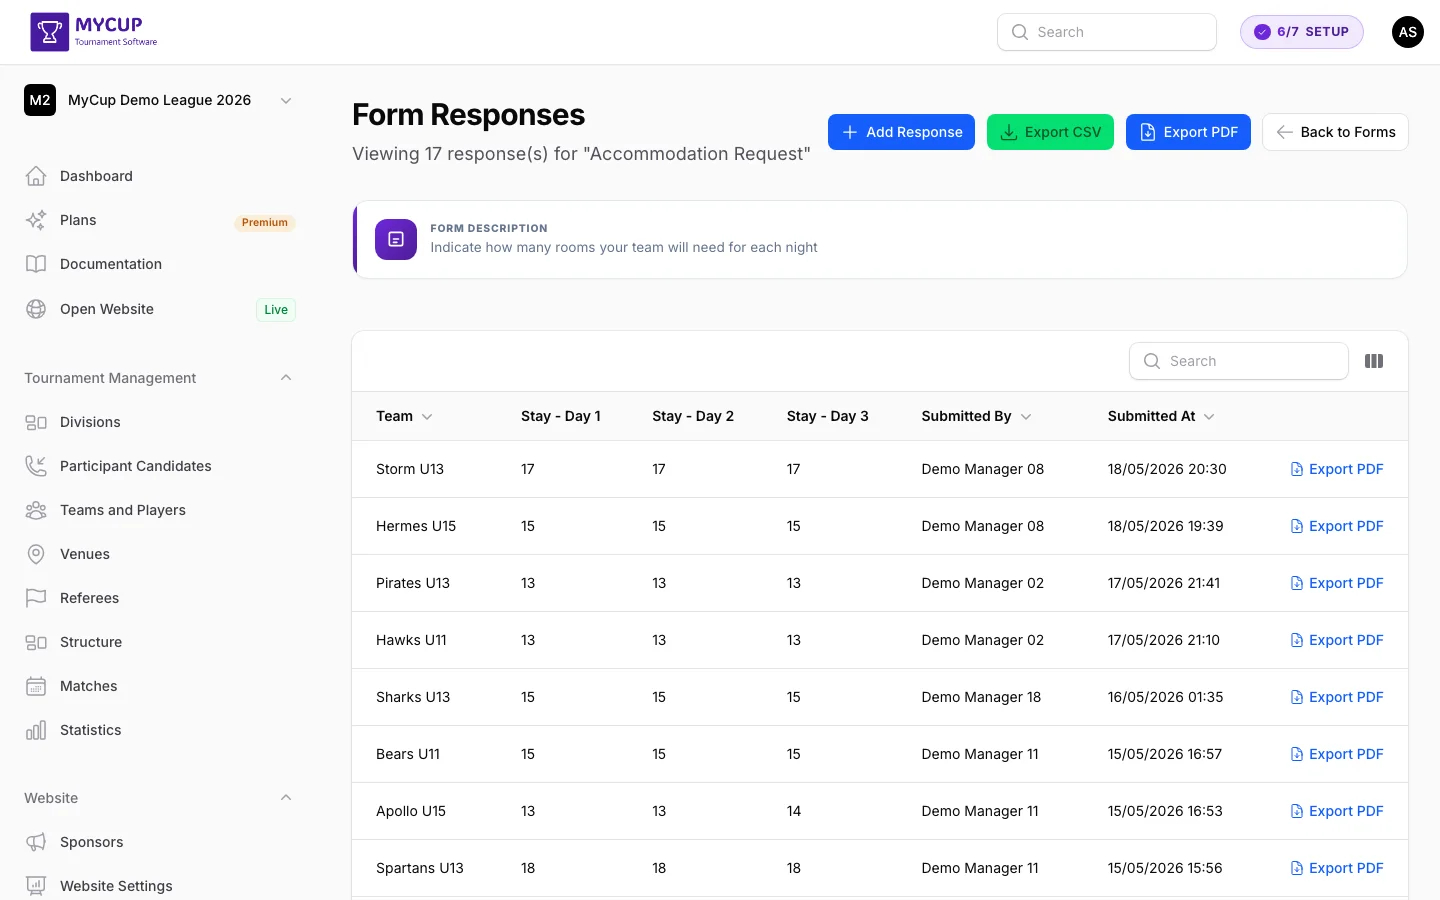
Exporting Responses#
The responses page offers several export options:
Export CSV -- Downloads all submissions as a spreadsheet. Includes all fields, submission status, who submitted, and when. Teams that haven't submitted are also listed. Useful for sharing raw data with vendors or working with the data in a spreadsheet application.
Export PDF (all teams) -- Generates a formatted, printable PDF document with all teams in a table. When you click Export PDF in the page header, a configuration dialog opens with two sections:
Form fields -- A table listing every field in the form. For each row you choose:
- Include -- Whether the field appears as a column in the PDF. Ticked by default for every field.
- Column total -- Available only for numeric fields. When ticked, the bottom Total row of the table shows the sum of that column across all submitted responses. Off by default, so totals only appear where you explicitly ask for them. This is the right option when you need things like "total number of meals per type" for a caterer.
The row directly under the column headers (Bulk:) contains a master checkbox for each column. Click the Include master to tick or untick every field's Include in one click, or the Column total master to flip every numeric field's Column total. Useful when you want to start from "everything off" and only enable a few columns, or vice versa.
Auto-computed columns -- Optional extra columns appended to the right of the table. Both are off by default:
- Number of players per team -- Adds a Players column with each team's roster size, taken from the team's registered players (not from this form's responses). Useful when you want to cross-check form numbers against actual squad size.
- Per-team total of numeric fields -- Adds a Total column summing every numeric field for each team, plus a grand total in the bottom row. Only available when the form contains at least one number field. Handy when you want the total per team rather than per column.
The PDF shows all teams (including those that haven't submitted yet) with their field values in a clean table layout. Useful for printing or sharing as a formatted report.
Export PDF (single team) -- Each row in the responses table has an Export PDF action button. Clicking it downloads a portrait PDF containing only that team's response, with all field labels and values displayed in a clean vertical layout. Useful when you need to share or print a specific team's answers.
Viewing Responses on the Participant Edit Page#
You can also view a team's form responses directly from the participant edit page:
- Go to Teams & Players in the sidebar
- Click Edit on a team
- Open the Form Responses tab
This tab shows all forms the team has submitted, with the submission date and who submitted. From here you can:
- Export PDF -- Click the Export PDF action on any row to download that single form response as a PDF
- Export All as PDF -- Click the Export All as PDF button in the tab header to download all of the team's form responses combined into a single PDF document
- View All Responses -- Navigate to the full responses page for that form to see all teams' submissions
This is especially useful when reviewing a specific team's information, as you can see their profile, players, staff, documents, and form responses all in one place.
Tracking Submission Progress#
The forms list shows submission progress for each form (e.g., "2 / 20" means 2 out of 20 teams have responded). Teams that haven't submitted yet are shown as "pending."

Submission Notifications#
You can receive an email every time a team submits any custom form. This is useful when deadlines matter or when you want to follow up with the team right after they respond.
Configure notifications on the Team Panel → Settings page, in the Notifications tab:
- Enable form submission notifications — Turn email notifications on or off.
- Notification Email Addresses — A shared list of up to 3 addresses that receives every enabled team-panel notification (form submissions and, when turned on, document uploads). Type each address and press Enter. The notification is sent to every recipient on every submission.
Each email includes the tournament name, form name, team name, who submitted, and when. A View Response button opens the responses page in your admin panel. The email itself does not include the submitted answers — this keeps the notification short and ensures you always review the latest data in the admin panel.
Notifications fire on:
- The first submission by a team
- Any re-submission, when Allow Editing is enabled on the form
The notification is sent in your tournament's configured language.
For Teams: Filling Out Forms#
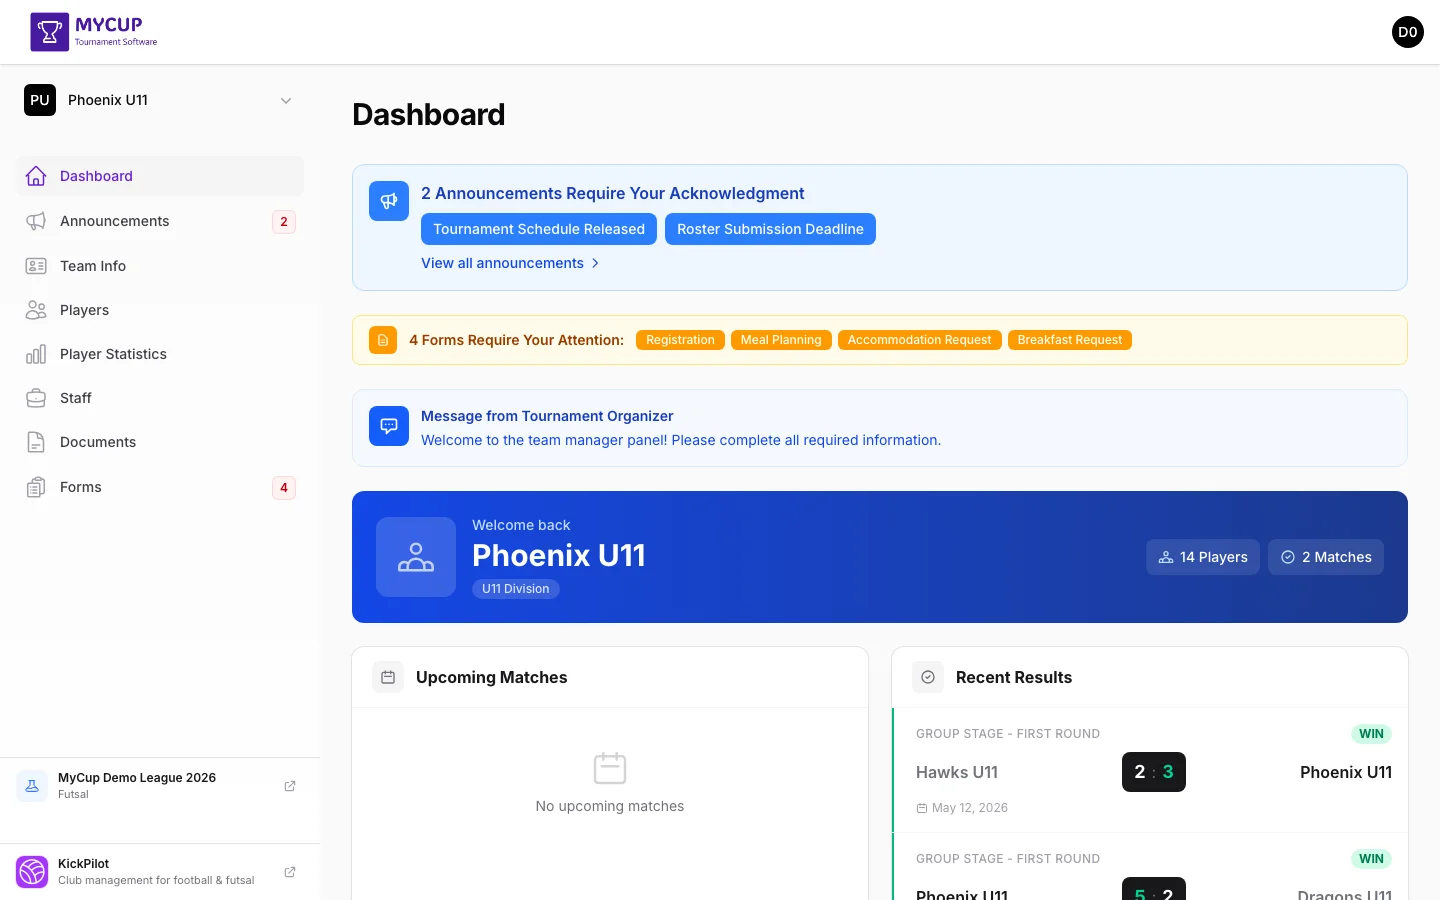
Dashboard Notifications#
When your team has pending forms, the Team Panel dashboard shows an alert with the list of forms that need to be completed.
Accessing Forms#
- Log into the Team Panel
- Click Forms in the sidebar
A badge next to "Forms" shows how many forms still need to be completed.
Forms List#
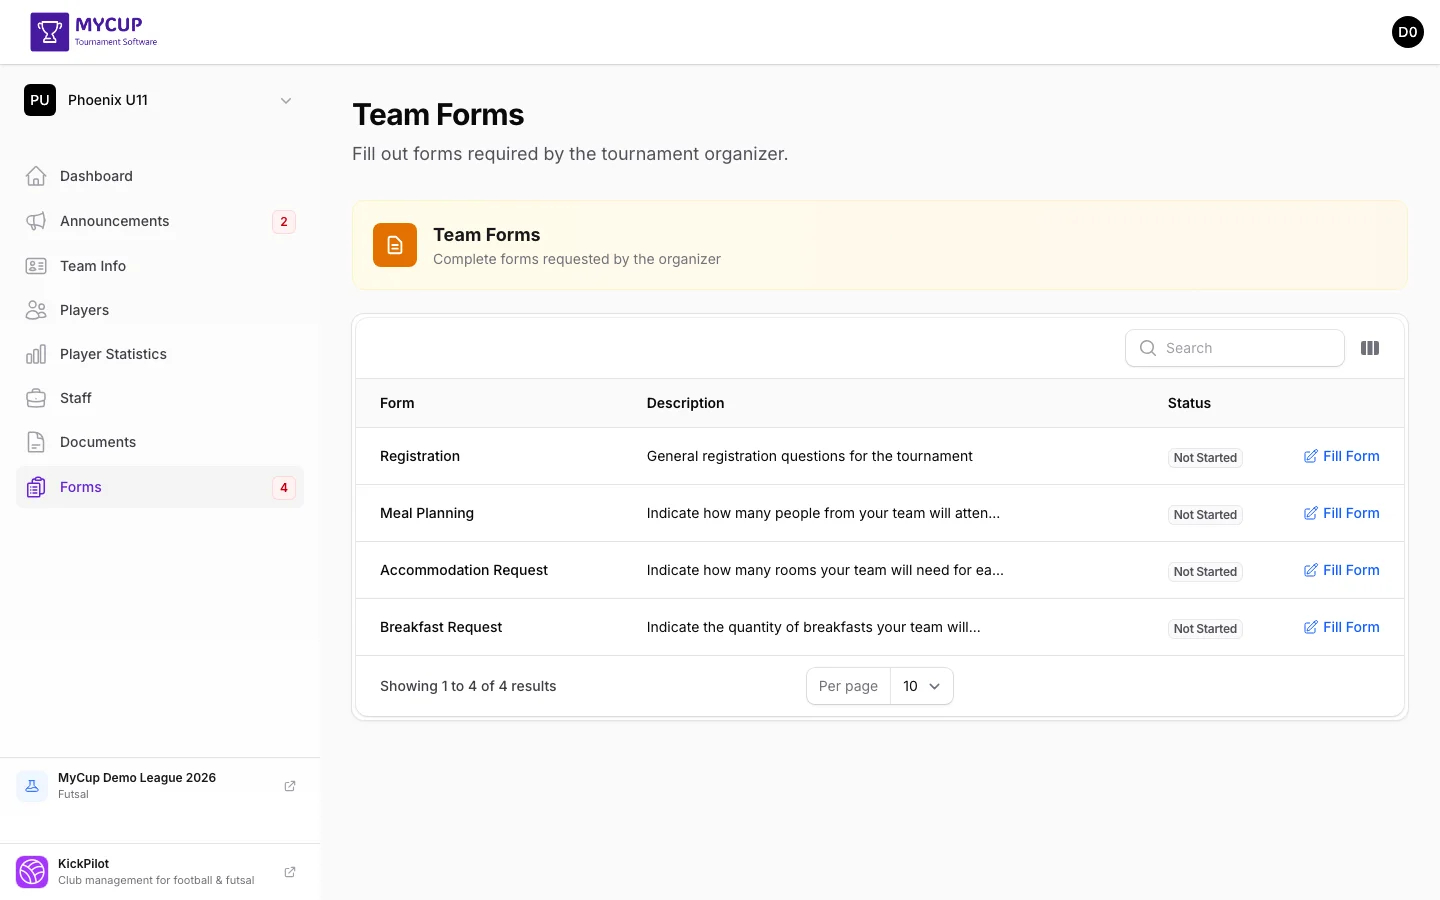
The list shows each form with:
- Form name and description
- Status:
- Not Started -- You haven't submitted this form yet
- Completed (Editable) -- Submitted, but you can update your response
- Completed -- Submitted, no further changes allowed
- Action button -- "Fill Form" for new forms, "Edit Response" for submitted ones
Filling Out a Form#
- Click Fill Form next to the form you want to complete
- Read the description and instructions at the top
- Fill in all fields -- required fields are marked with an asterisk (*)
- Click Submit
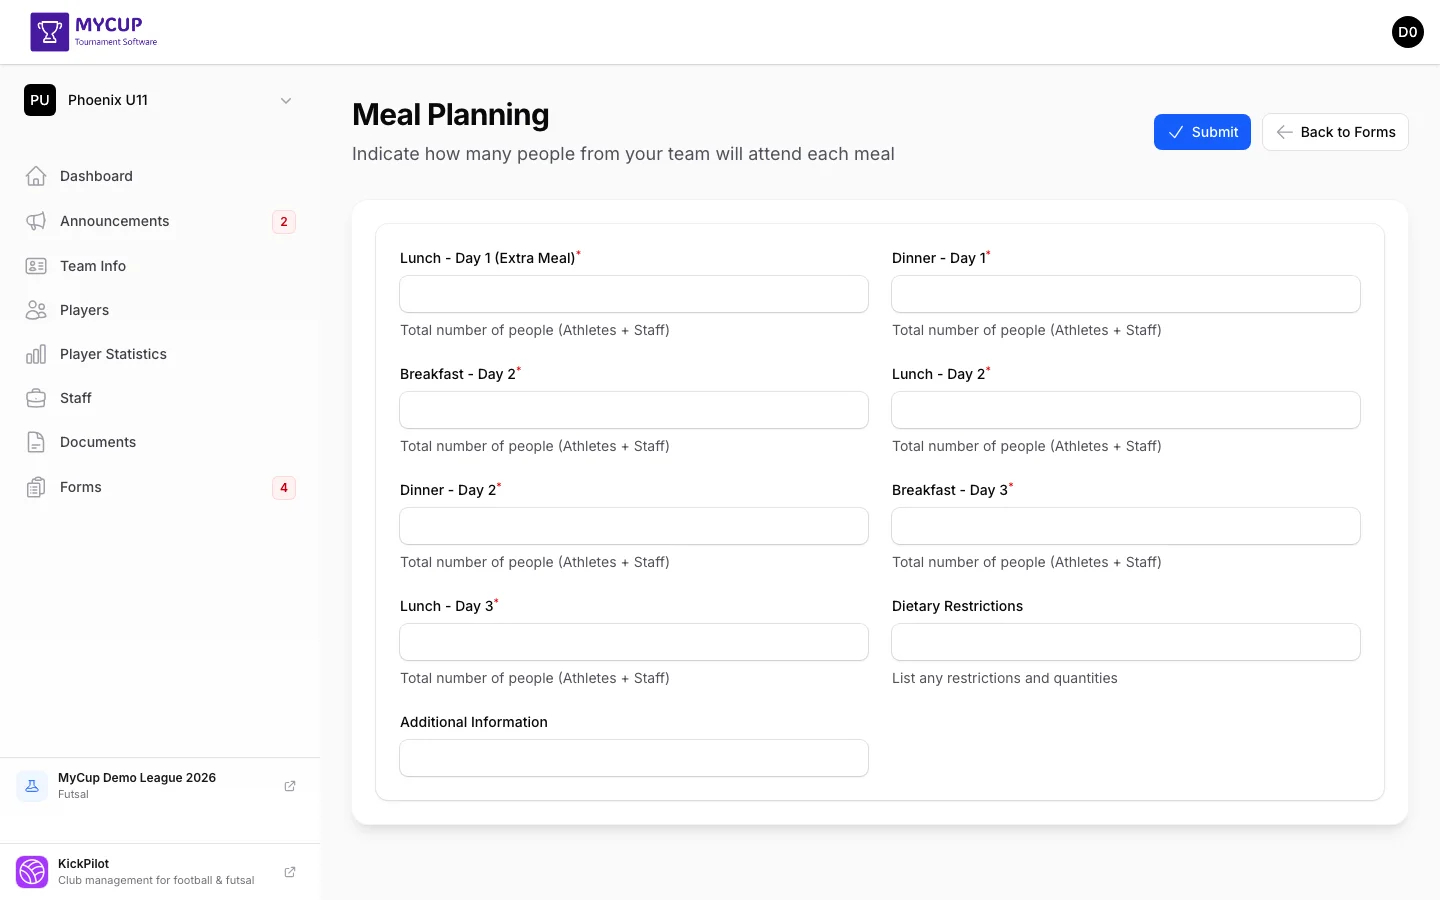
Field Types You May Encounter#
- Number fields -- Enter a numeric value (e.g., number of people)
- Date fields -- Pick a date using the date picker or type directly
- Dropdown fields -- Select one option from the list
- Text fields -- Type your answer freely
- Checkboxes -- Check to agree or confirm
Editing a Response#
If the organizer has enabled editing:
- Go to Forms in the sidebar
- Click Edit Response next to the form
- Your previous answers are pre-filled
- Make your changes
- Click Update Response
If editing is not allowed, the form shows as "Completed" and cannot be changed.
Tips for Organizers#
Keep forms focused -- Create separate forms for different topics. A "Meal Planning" form and an "Accommodation Request" form are easier to manage than one combined form.
Write clear descriptions -- Tell teams exactly what you need, why you need it, and mention any deadlines. For example: "Submit this form at least 2 weeks before the tournament starts."
Use helper text -- Add hints below fields to clarify what's expected. For example: "Total number of people who need breakfast (players + staff)"
Choose the right field types -- Use Number fields for counts (not Text), Dropdown for limited choices, and Date fields for dates. This keeps the data consistent and easier to work with.
Enable editing when appropriate -- For information that might change (meal counts, accommodation dates), allow teams to edit their responses. For final agreements or contracts, disable editing.
Export and share -- Use the CSV export to share raw data with vendors, or the PDF export for a clean printable report. The PDF export lets you pick specific fields and tick Column total on the ones that need a sum, so you can hand a caterer a report with the exact totals per meal type already calculated — no manual summing required.
Was this page helpful?
Let us know if you found this documentation helpful or if you have suggestions for improvement.